~ How To Projects ~
How to Chain
Learn how to chain with this beginner's guide to crochet basics. Great pictures with instructions show you how to chain.

Click below for more
Craft Projects and Patterns
|
~ Related Projects ~
Get this entire project
WITHOUT
Ads, Banners, Logo or Margins
Purchase the Ad Free / Easy Print PDF Version for only $1.49

|
|
Crochet Instructions: How to "Chain"
Go back to How to Crochet a Scarf Main Project Page
© Copyright 2007 by AOK Corral Craft and Gift Bazaar All rights reserved.
These projects are for your personal use only and may not be reprinted or copied.
You may print this page as is or... See our easy print option below.
|
|
|
|
|
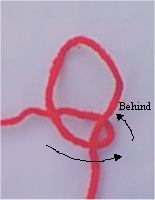
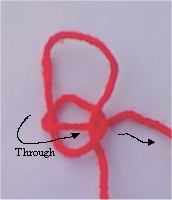
Create a slip knot about 3 inches from the end of the yarn as shown in these photos.
|
The 3 inches are the "yarn end", the other yarn that you will be crocheting with is the "working yarn".
|
| |
|
|
|
|
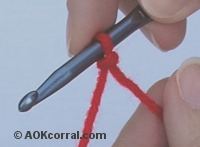
Step 1.
Place the loop onto one of your needles and tighten.
|
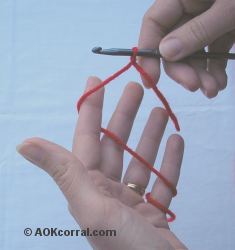
Step 2.
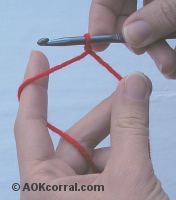
Hold the crochet hook in your right hand and position the working yarn through your left hand as shown and then clasp your hand together lightly. This hold will allow the yarn to flow through your fingers freely as you work but to also create a tightness in the working yarn at the place you are working. This tightness is called "tension".
|
| |
|
|
|
|
Step 3.
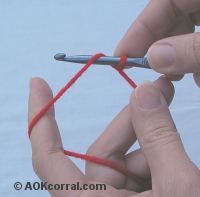
Continue to hold the hook and the working yarn as instructed. Additionally, take hold of the tail end of yarn (or of the work you have already done) with your thumb and middle finger. This helps to hold the work steady while you crochet. (see photo)
|
Step 4.
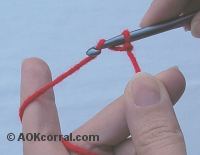
Hold the yarn still and send your crochet hook under the working yarn from the front to the back. The yarn is now over the crochet hook. This is called "yarn over" or YO.
Another way this can be done is to move the yarn over your hook from the back to the front.
|
| |
|
|
|
|
Step 5.
Begin to pull back on the crochet hook and let the hook catch the working yarn.
|
Step 6.
Continue to pull the hook with the yarn in it all the way through the loop that is already on the hook. You have just made one "chain".
|
| |
|
|
|
|
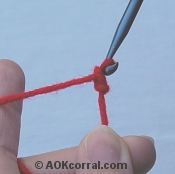
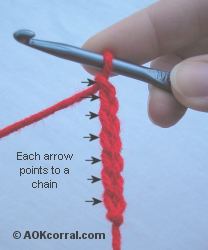
Step 7.
Repeat Step 4 -6 again for each "chain" that you want to add.
At anytime you can count how many chains you have by counting the chain edges as shown in the photo.
|
|
|
You may Print this page as it is ...OR...
Purchase the Easy Print Version for $1.49
The Easy Print Version includes, chain, single crochet, double crochet, and scarf; all directions, photos and instructions for this entire project without margins, ads or logos.
Great copy for classes or personal learning on the go!
|
|
Go back to How to Crochet a Scarf Main Project Page
|
|
|


