
 |
 |
|
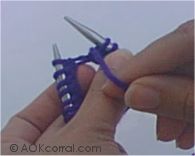
| Row One:
Step 1. Start by doing one "knit" stitch. After you complete the stitch, bring the yarn to the front of your work between the two needles. |
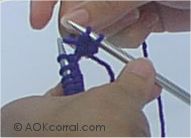
Row One:
Step 2. Do one "purl" stitch. After you complete the stitch, send the yarn back behind your work between the two needles. |
Row One:
Repeat Continue step 1 and step 2 until you reach the end of the row. Turn your needle over to do next row. |
|
|
|
 |
| Row Two:
Step 1. Do one "purl" stitch. After you complete the stitch, send the yarn back behind your work between the two needles. |
Row Two:
Step 2. Do one "knit" stitch. After you complete the stitch, bring the yarn to the front of your work between the two needles. |
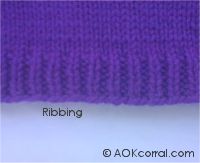
Row Two:
Repeat: Continue step 1 and step 2 for the second row until you reach the end of the row. To work in rib of 1 x 1; you will need to continue to repeat row 1 then row 2 until you reach your desired rib length. |
© Copyright 2004 by AOK Corral Craft and Gift Bazaar.
All rights reserved.
These projects are for your personal use only and may
not be reprinted or copied without written permission from AOK Corral.