- Blank note cards (any size)
- Contact paper
- Large textbooks
- Flowers & greenery
- Glue stick (dry glue)
- Scissors
|
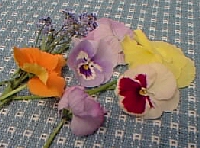
Tips: When selecting flowers or greenery to press, use flowers that are thin and delicate. There cannot be any large seed pods or woody stems. The flower must dry as well as press. Also, pick many light colored flowers because you will find that most of them darken up considerably through this process.
- Arrange flowers about 4 to 5 on a page in a large text book.
- Carefully flatten them as you want them to look when they are finished. (stem direction, petal placement, etc..)
- Carefully close the book. (watch that the petals do not bend)
- (Hint: Only pressing one set of flowers per book will help make sure that the flowers don't move or get wrinkled while you try to shut the book.)
- Place several other large text books on top of the book with the flowers inside. (about 10lbs)
- Leave them alone and let them press until dry. (about 5 to 7 days)
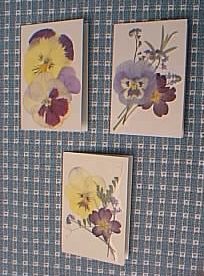
- Arrange your dried flowers the way you would like them to look when the card is finished.
- Notice which pieces you have placed in the background and which pieces you have placed on top.
- Now take them off of the card.
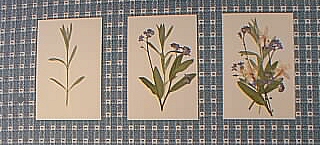
- Start with the flower or greenery that you want in the back of the design.
- Put a very light amount of glue along an imaginary placement line for that piece. (This must be a dry glue stick, liquid glue will ruin your flowers.)
- Then stick the flower or greenery on the glue.
- Continue gluing the flowers and greenery onto the card, working toward the foreground.
- (Hint: You may need to add additional glue to tack down edges of petals. Gently rub a little glue on the tip of your finger, apply it on the card under the petal or leaf that needs to be tacked down. Important: Do not rub the glue stick directly on the flowers.)
Let the card dry completely. (about 1 hour)
- Open the card out flat and cut a piece of contact paper that is 1/2 inch larger (on each side) than the card.
- Lay the contact paper on a table (sticky side up) and carefully set the outside fold of the card down, centered on the contact paper.
- Press the front of the card down onto the contact paper, pushing from the fold outward toward the edge of the card. (you want to be sure it will be smooth, with no air bubbles, the first time)
- Do the same with the back side of the card and you should have Step 1, pictured at above.
- Step 2, fold in two opposite sides of the contact paper toward the inside of the card.
- As shown in Step 3, cut off the overlapped corners of contact paper.
Then lastly, Step 4, fold in the other opposite sides of contact paper toward the inside of the card.
|
|