~ How To Projects ~


Go To All Projects ~ Click Here

Click below for more
Craft Projects and Patterns


~ Projects By Theme ~


Get this entire project
WITHOUT
Ads, Banners, Logo or Margins

Purchase the Ad Free / Easy Print PDF Version for only $1.35


AOK Corral Craft and Gift Bazaar
AOK Corral HomeCraft ProjectsFamily Activities

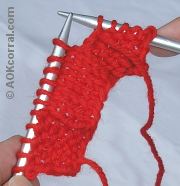
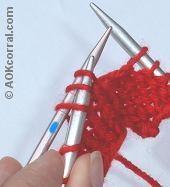
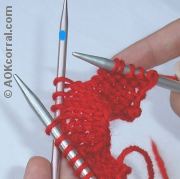
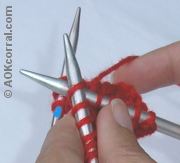
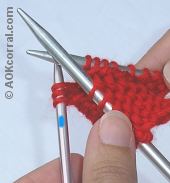
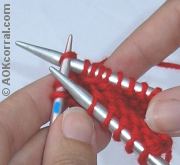
How To Projects ~ Knitting ~ How to Knit Cables for Beginners

Knitting Instructions: Cables Part 2

Go back to How to Knit Cables - Cable Pillow Main Project Page

© Copyright 2007 by AOK Corral Craft and Gift Bazaar All rights reserved.
This project is for your personal use only and may not be republished or copied.

How to Knit Cables: Back of Work

(This page shows how to hold in "back" of work. To see instructions for a cable that must be held in "front" of work, click here) Our instructions are shown using a method that allows you to use a spare regular needle or cable needle. Blue marks highlight the "cable needle" in each photo shot.
First, stitch across the pattern until you come to the series of stitches that are to be cabled. (Most patterns have an abbreviation for the cable to be made (ie..C3B), you can read the definition of the abbreviation on your pattern to learn whether to hold the cable needle in front or in back and how many stitches to slip onto your cable needle.) Step 1. Drop your right needle and pick up your cable needle (or spare needle). At the back of your work, slide the tip of your cable needle from left to right along the left needle and through the number of stitches your pattern indicates should be slipped onto the cable needle.
Step 2. Slide the stitches completely off of the left needle so that they are only on the cable needle. (Hint: In the next step you will be dropping the cable needle and taking the right needle again; to keep the cable needle from sliding out of the stitches, rest the other end of the cable needle against yourself.) Step 3. Drop the cable needle out of your right hand and let it rest in the back. Pick up the right needle again, along with the working yarn and proceed with the next stitches as your pattern indicates. Usually this will be knitting the same number of stitches as was slipped onto the cable needle but check your pattern instructions.
Step 4. Now drop the left needle and pick up the cable needle with your left hand. (Let the left hand needle hang in the front.) Step 5. Proceed to work all the stitches on your cable needle just as you would if the cable needle was your regular left hand needle.
Now you can set your cable needle aside. Pick up the left needle again with your left hand and continue your pattern.
To see instructions for a cable that must be held in "front" of work, click here)

You may print this page as is or...
Easy Print Option:
Includes all patterns and instructions for this entire project without margins, ads or logos.

Or...Go back to Knit Cable Pillow Main Project Page


© Copyright 2007 by AOK Corral Craft and Gift Bazaar.  All rights reserved.
These projects are for your personal use only and may not be republished or copied.

Do you like this project? Would you like to see more like it?
What kinds of projects to you like?
Please Tell Us

If you enjoy these free projects, please support our website by shopping our Craft Bazaar
or by purchasing the AD Free/Easy Print PDF Version above.

To View other Projects go to Project Library Page

| Home | Craft Projects & Patterns | Family Activities |
| Sitemap | Contact Us |

© Copyright 1998 - 2023 AOK Corral Craft and Gift Bazaar - All rights reserved