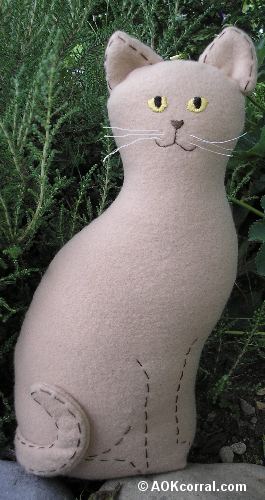
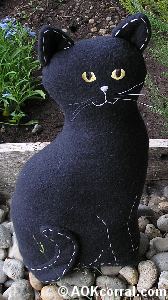
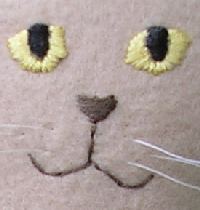
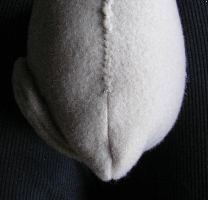
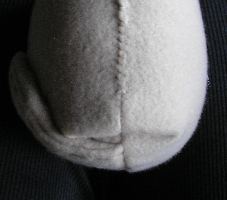
~ How To Projects ~

Stuffed Cat Pattern

This pattern makes a fun and lovable cat doll. Our stuffed cat is easy to make. The cat is sitting and can be made in cat colors or fun print fabrics.


Go To All Projects ~ Click Here

Click below for more
Craft Projects and Patterns


~ Projects By Theme ~


Get this entire project
WITHOUT
Ads, Banners, Logo or Margins

Purchase this pattern for only $1.49


AOK Corral Craft and Gift Bazaar
AOK Corral HomeCraft ProjectsFamily Activities

How To Projects ~ Animals ~ Stuffed Cat Pattern

Stuffed Cat Doll Pattern
~
July 2009


© Copyright 2009
by AOK Corral Craft and Gift Bazaar
All rights reserved.

These projects are for your personal use only and may not be republished or copied.

You may print this page as is or...
Easy Print Option:
Includes all patterns and instructions for this entire project without margins, ads or logos.

Materials Needed:
  • 1/4 to 1/3 Yard of fabric (fleece or cotton)
  • Embroidery floss (color that contrasts against the cat body color, black and yellow for eyes)
  • Thread to match cat body color
  • Fiberfill Stuffing
  • Small scraps of light to medium weight interfacing
  • Fishing line pieces
  • Sewing Needle
  • Sharp sewing scissors
  • Pins
  • Sewing Machine
  • Cat Pattern Pieces

This cat's finished measurements is approx. 12" tall and 6" wide.

Cut out and mark the Cat Pattern Pieces:

  • Fold the fabric wrong sides together and pin the pattern pieces onto the fabric through both layers. Cut them out.
  • Take out the pins and remove the piece of fabric that will be the cat body back.
  • Take the cat body front and pin the pattern back on.
  • Make thread markings at each of the dots located on the leg guidelines and at the tail position.
    • To make thread markings: Thread your needle and do not tie a knot.
    • Send your needle down through one side of the dot along the guideline and then back up through the other side of the dot.
    • Pull the thread until there is only about 1 inch of thread left hanging out and then cut the thread on the other side about 1 inch from the dot. (This leaves a thread mark that can be easily pulled out when you are done.)
  • Make more thread markings around the eye and at the nose as needed to help you find the correct placement when embroidering.

Embroider the Details:

  • Embroidery the nose and mouth onto the cat face following any placement thread marks that you made.
  • To make the eyes, take your interfacing and lay it over the cat face pattern then trace the eyes with a fine point pen. Cut them out.
  • Position one of the eyes into place on the face and use a satin stitch to fill in the eye colors.
  • Repeat with the other eye.
  • Thread your needle with a piece of fishing line that is about 3 inches long.
  • Send the line into the cat’s face for a whisker and pull about halfway through.
  • Behind the cat body front, make a knot in the center of the piece of fishing line and then send the other end through the other side of the face for another whisker in the front.
  • Repeat these last 2 steps to create another couple of whiskers. Trim ends if needed.
  • Embroider the leg lines onto the cat front by following the thread markings. Use a running stitch in the contrasting floss color for these lines.

Make the Cat Tail:

  • Match the tail pieces right sides together and secure with pins.
  • Stitch the cat’s tail together along the stitching lines and remove the pins.
  • Clip the seam allowances all the way around the tail every ¼ to ½ inch, especially around the tip curves. Turn the tail right side out and make sure the edges are flat.
  • Embroidery a running stitch with the contrasting floss color about ¼ inch from the edges of the tail. (Your stitches only need to go through the front side of the tail.)

Make the Cat Ears:

  • Match the ear pieces right sides together and secure with pins.
  • Stitch each of the cat’s ears together along the stitching lines and remove the pins.
  • Clip the seam allowances all the way around the ears. Turn the ears right side out and make sure the edges are flat.
  • Embroider a running stitch with the contrasting floss color about ¼ inch from the edges of the cat ears. Your stitches should only go through the front sides of the ears.

Make the Cat Body:

  • Lay the cat body front out in front of you.
  • Place the finished cat tail into position on the cat body and pin into place. (center between the tail markings on the body front with raw edges of the tail and body lining up)
  • Lay the cat body back onto the body front with right sides together and pin together.
  • Carefully stitch together the cat body along the stitching lines (approx. ¼ inch from edge). Secure the beginning and ending spots by stitching back and forth an extra time.
  • Clip into the seam allowances every ½ to 1 inch around all curves and at all turning points.
  • Turn pieces right side out. (Use the eraser end of a pencil to help push the edges out.)
  • Fill the cat’s body with fiberfill stuffing. (Note: If you would like your cat to sit up on its own, leave about 1 inch unfilled. Place heavy plastic or metal beads (enough to fill the gap) into a small zip lock bag and place the bag inside the bottom of the cat before the next step.)
  • Turn the seam allowances inside at the opening of the cat body and stitch the openings together with small stitches in the matching thread color for the cat.
  • Push the bottom corner points of the cat into the body ½ to 1 inch and then sew those edges closed. (see photos)
  •  
  • Attach the tail against the body with some stitches that are hidden through the backside of the tail and the body.

Attach the Ears:

  • Turn ¼ inch of the opening of the ears to the inside, stitch the opening closed with small stitches in the matching thread color.
  • Position the ear onto the head just behind the top seam and with the inner edge of the ear about ½ inch from the center of the cat head. As you put the ear into position slightly fold the left and right edges of the ear in toward each other to form an inner ear.
  • Stitch into place using small stitches.
  • Repeat for the other ear.

Done!
Fun for the child (or adult) that loves cats!


© Copyright 2009 by AOK Corral Craft and Gift Bazaar.  All rights reserved.


| Home | Craft Projects & Patterns | Family Activities |
| Sitemap | Contact Us |

© Copyright 1998 - 2023 AOK Corral Craft and Gift Bazaar - All rights reserved