- Gingerbread man doll pattern Click Here
- Brown Fabric (Soft and flexible)
- Embroidery Floss, white, black, red, and blue.
- Sewing Machine OR a sewing needle and brown or black thread.
- Red Felt Scrap
- Scissors
- Embroidery Needle
- White Lace Scrap
- White Bias Tape Scrap
- Pink 1/4" wide Ribbon
- Black 1/4" wide Ribbon
- Buttons, blue and red
Finished Size: Approx. 8" tall and 7" wide
|
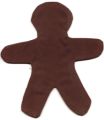
- Cut out pieces of the brown fabric using the gingerbread man pattern. Click Here to get the pattern now.
- With wrong sides together, Pin both gingerbread pieces together.
- Stitch together 1/4 - 1/2 inch from the edge with brown or black thread, using a sewing machine or hand stitch using a Backstitch. (Be sure to leave the opening on one side leg of the gingerbread man as shown on the pattern.)
- Important: Make small cuts in the seam allowance (that is the portion of fabric between the seam and the fabric edge) up to the stitching at all corners and around all curves. (This helps the fabric to press out smoothly. Suggested marks for these cuts are shown on the pattern.)
- Turn the gingerbread man right side out through the side leg hole. (A pencil head is helpful to push the fabric right side out through the hole.)
- Press all edges with your iron.
- Gently stuff the gingerbread man with poly fill until he is just about 1/2 inch thick.
- Stitch up the side leg opening.
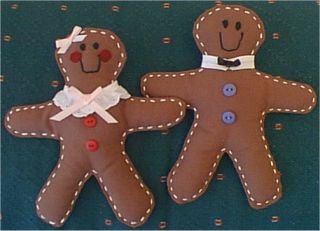
- Using 6 strands of white embroidery floss, start a Running stitch around the gingerbread man about 1/8 inch from the finished edge.
- Using black embroidery floss, 3 strands, sew on the eyes using a Satin stitch and the mouth using a Backstitch. (approximate placement is shown on the pattern.)
- Center two buttons on the front of each gingerbread man.
- Stitch in place.
- Cut out small circles from the red felt to be her cheeks.
- Stitch them in place just outside the smile as shown on the pattern.
- Cut a piece of lace that is long enough to go around her neck.
- Wrap the lace around her neck with the two ends in front.
- Stitch in place.
- Tie two ribbon bows, one for the middle of her collar and one for her head.
- Stitch in place.
- Cut a piece of white bias tape long enough to fit around the neck.
- Wrap the bias tape around his neck so that the upper corners of the two ends meet in front.
- Stitch in place.
- Tie a black bow of ribbon.
- Stitch in place.
If you would like to use them as hanging decorations or ornaments, use a 6 inch piece of Embroidery floss, thread it onto a needle, send the needle and floss through the top back of the head once. Next, take the floss off the needle and tie the ends together to form a loop hanger.
|
|


