~ How To Projects ~
Plastic Canvas Baby Box
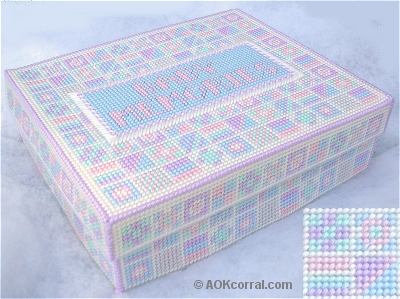
Enjoy making this plastic canvas baby keepsake box for storing special baby memories.

Click below for more
Craft Projects and Patterns
|
~ Projects By Theme ~
- Animals
- Seasonal
- Holidays
Get this entire project
WITHOUT
Ads, Banners, Logo or Margins
Bonus: The Easy Print Version contains all instructions for the box plus letter patterns for adding baby name to the box.
Purchase the Ad Free / Easy Print Version for only $1.49

|
|
Plastic Canvas Baby Keepsake Box
~
June 2007
|
|
If you don't know how to stitch on plastic canvas, you can go to: How to stitch on Plastic Canvas to learn how.
- Cut 1 - Top of box: 81 squares long and 67 squares wide.
- Cut 1 - Bottom of box: 79 squares long and 65 squares wide
- Cut 2 Long side of box: 79 squares long and 23 squares high
- Cut 2 Short side of box: 65 squares long and 23 squares high
- Cut 1 Long side lid edge: 81 squares long and 10 squares high
- Cut 2 Short side lid edge: 67 squares long and 10 squares high
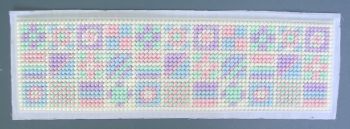
- Cut 1 Baby Memories Label Piece: 58 squares long and 25 squares high OR if you want to personalized the box with the babys name; all letters of the alphabet and instructions for making a personalized name label for the top of the box are available in our Easy Print PDF version of this project.
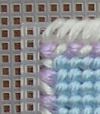
- Using the patchwork design pattern (linked in the materials list above), complete each of the four sides of the box and the bottom of the box. The patchwork design will begin in the top left corner and repeat as it is needed toward the right and/or down.
- First, stitch an extra row of yellow stitches along the top, left and right of a lid edge piece. (These extra rows allow the lid to be slightly larger than the box so it will fit over the box.)
- Next, complete the top row of the patchwork pattern, repeating as necessary, until it covers the full length of the lid edge piece.
- Repeat for all lid edge pieces.
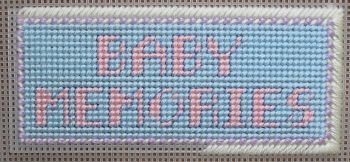
- Follow the label patterns (links in the materials list above) to make the label for your box but save the long yellow stitches for the next step. (Optional: you may wish to outline the letters with a slightly darker embroidery floss.)
- You will use long stitches to attach the label to the box. The long stitches will create a sort of frame for the name label and also hold it in place.
- Lay your name label on the piece of plastic canvas you have cut for the top.
- Center it by counting the number of stitch lines or squares on each side of the label piece and moving the label piece until the number of stitch lines or squares on each side is the same (or only one different if there was an odd number). Center both vertically and horizontally.
- Follow the long stitch lines in the label pattern above to attach the label to the top.
- To stitch the remaining box top, first stitch a row of yellow around the entire box top on the first stitch line in from the edge. (These extra rows allow the lid to be slightly larger than the box so it will fit over the box.)
- Next, inside this outer row, stitch the patchwork design starting from the top left corner and moving across the box to the right and down until the rest of the top is covered in the design.
- Using your iron, press your lining fabric if needed and then lay your lining fabric out on your work table.
- Take a piece of your box and lay it on the lining fabric. Hold it in place.
- Use your ruler, measure and make marks ¼ inch from the edge of the plastic canvas piece all the way around.
- Cut out the fabric along the marks.
- Put the box piece aside and turn the fabric so it is wrong side up.
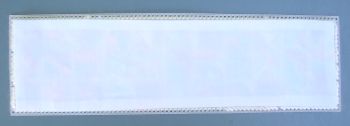
- Fold the fabric edges 3/8 inch in toward the wrong side and press in place.
- Lay the lining on the box piece with wrong sides together to make sure that it fits correctly.
- Repeat to create a lining for each piece and set them aside.
- Finally, thread your yarn needle with baby purple to begin joining the pieces.
- Join the pieces in the following manner:
- Line up the holes of each piece that you are joining.
- As you begin, secure the end of the yarn by sliding it under several stitches on the back of one of your pieces and near the corner where you will begin.
- Start at one corner hole and bring your needle through from the wrong side.
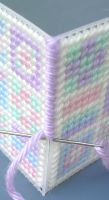
- Next, go through the adjacent hole in the other piece from the right side through to the wrong side.
- Continue joining the piece by looping through each pair of holes in this manner.
- First, join the lid edge pieces to the bottom, left and right edges of the top.
- Next, join each of the sides of the box at the corners.
- Now, stitch the bottom of the box to the already connected sides.
- Finally, stitch the top edge of the lid directly to the back side of the box to create a hinged box cover.
- First apply the lining pieces to the inside of the box.
- One at a time, apply tacky glue around the entire folded lining edge being careful not to apply so much glue that it will run.
- Carefully pick up the lining piece and place it, wrong sides together, on the box piece that it was made to cover.
- Repeat for each piece inside the box and let dry with the lid left opened out.
- Next, do the same for the pieces on the top of the box and leave the top opened out while the glue dries.
|
Project
Options:
|
1.) Read or Print this project from our website, as is, for free.
|
2.) Purchase Easy Print Version - Download NOW:
- Convenient - NO ads, menus, or margins - Save ink and paper
- Complete - All instructions & patterns for this project + Bonus*
*This version includes all instructions plus the alphabet patterns for personalizing the label.
|

|
|
|
|


