~ How To Projects ~
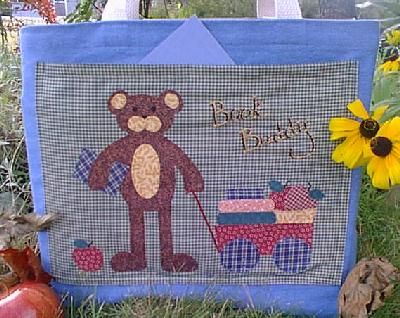
Applique Book Bag
Decorate a book bag with our easy applique book bag design.

Click below for more
Craft Projects and Patterns
|
~ Projects By Theme ~
- Animals
- Seasonal
- Holidays
|
|
Appliqué Book Bag
~
September 2001
|
- One ready-made book bag or tote bag.
- Design Patterns (click on links below to print out pattern sheets)
- Misc. Calico Fabric colors/patterns (or other thin to medium fabric)
- Sharp Scissors
- Fusible Web (paper backed adhesive web sheet)
- Hot-Iron Transfer Pencil
- Tracing paper or Thin paper
- Ball point Pen
- Needle
- Embroidery Thread (colors to compliment fabrics)
- Iron
- Ironing board
- (*Optional: Sewing machine)
|
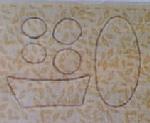
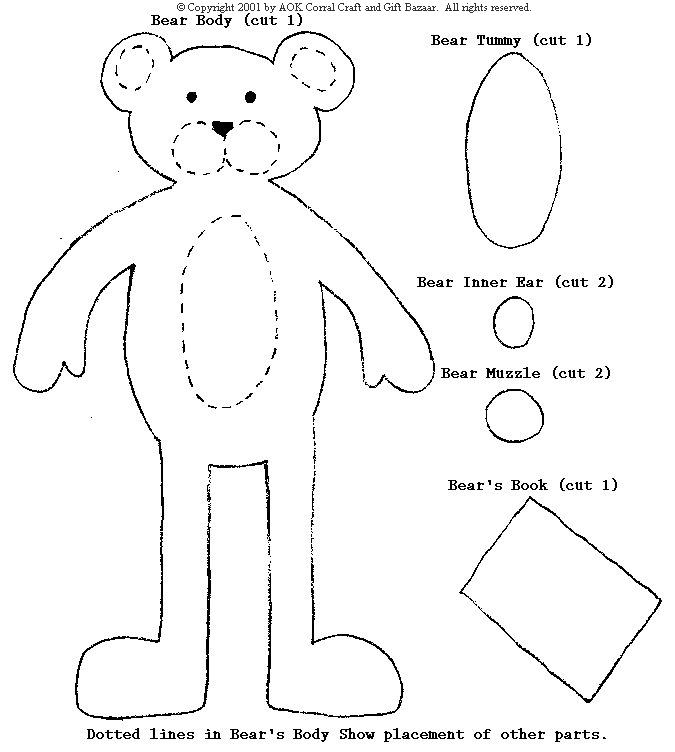
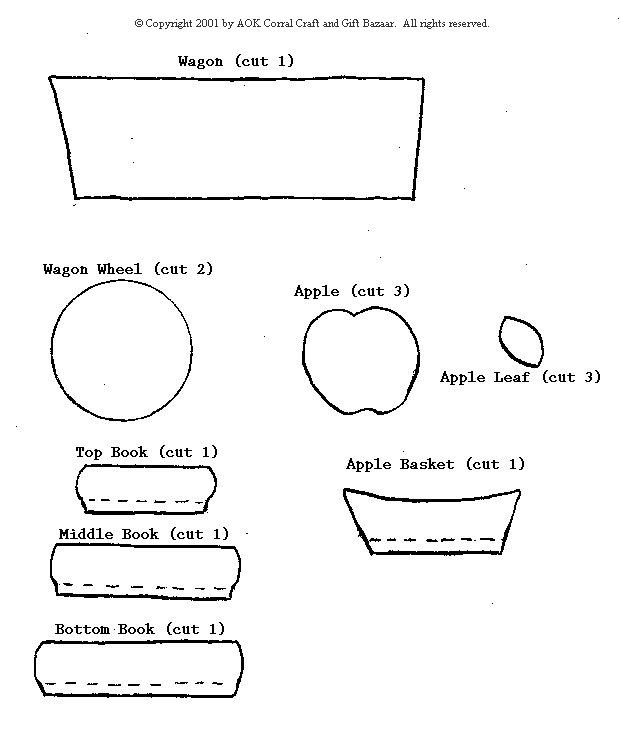
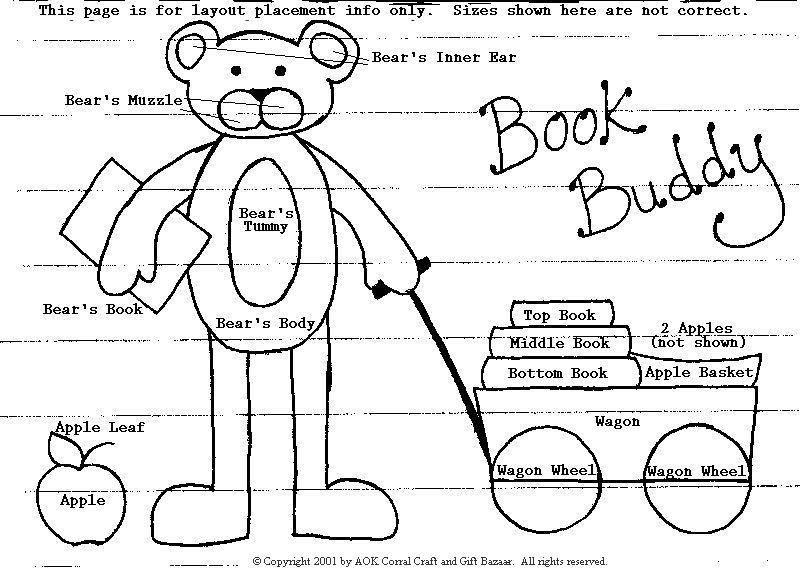
- Cut out the bear pattern pieces, and the wagon pattern pieces.
- Decide which fabric colors you will use for each of the pieces.
- On a flat surface, turn the fabric so that the right side is laying down and the wrong side is facing up.
- Lay the pattern pieces onto the wrong side of the fabric.
- Trace around each pattern piece with a ball point pen.
- After you have all the correct patterns drawn onto that fabric, cut around all of them to make one square. (Important: Do not cut out the individual pieces yet!)
- Cut out a piece of fusible web just a bit smaller than the square, but covering all your pieces.
- Follow the manufacturer's directions for applying the web to the fabric. Usually, that means placing the bumpy side of the paper against the wrong side of the fabric and going over it with a hot iron for 2 to 3 seconds.
- Leave the paper attached to the fabric and cut out the pieces. (You should be able to see the lines through the paper for cutting.)
- Prepare all the rest of the pieces for appliqué in the same way.
- Remove the paper backing from the appliqué pieces.
- (For Optional Pocket: Cut a piece of fabric 13" wide and 10" high. Leave space around the design of; 1 1/2" on each side, 1" on the bottom, and approx. 1 3/4" on the top.)
- Arrange the pieces onto the pocket or the bag as shown in the design layout placement sheet.
- When each piece is correctly positioned, press a hot iron down onto the pieces and hold for 30 seconds. Do this over the whole design.
- Turn the fabric over and press the hot iron down onto the back and hold for another 30 seconds. (This is to insure that the glue has completely joined the fabric pieces together.)
- Hand stitch just inside the edge of each piece with a matching color embroidery thread (2 strands). Use a running stitch. (This will secure the appliqué.)
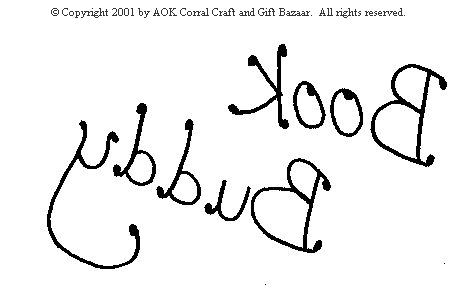
- Trace the "Book Buddy" words onto a piece of tracing paper using the hot iron transfer pencil.
- Turn the paper over so that the penciled words are against the fabric and in the correct position.
- Press a hot iron onto the paper for about 60 seconds.
- To make the wagon handle, use a ruler or book edge and draw a straight line from the bottom of the wagon to the bear's hand.
- Stitch the words and the wagon handle using a backstitch with 6 strands of embroidery floss.
- With wrong side up, fold the side and bottom edges of the pocket in 1/4" and press.
- Fold the top edge in 3/4" and press.
- Before putting the pocket onto the tote bag, stitch the top fold in place at 1/2" from folded edge.
- Pin the pocket, centered, onto the tote bag.
- With your sewing machine, stitch the pocket to the tote bag, along the sides and bottom. (Be careful not to catch the other side of the tote bag in your stitching.)
|
|
|


