~ How To Projects ~
Wooden Desktop Pen & Pencil Holder

Click below for more
Craft Projects and Patterns
|
~ Projects By Theme ~
- Animals
- Seasonal
- Holidays
|
|
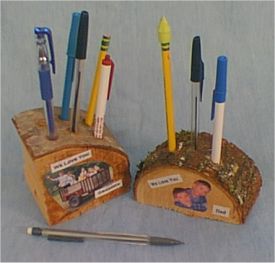
Wooden Desktop Pen & Pencil Holder
~
May 2004
(Great Gift For Dad!)
|
- Assorted Pieces of Split Wood Logs that are approx. 2 to 3 inches in diameter with at least one of the split sides being flat.
- Hand Saw
- Drill
- 3/8 inch Drill Bit (or larger for special wide width pens)
- Sandpaper
- Photos for personalized decoration.
- Print-outs of words or stickers for personalization.
- Scissors
- Decoupage clear coat medium.
- Paintbrush
|
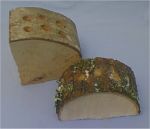
- Using your saw, cut a 2 to 3 inch piece off of your split wood log.
- With sandpaper, smooth the ends cut by the saw.
- Set the wood on its flat split side (that will become the bottom of the holder with the rounded bark end up at the top of the holder).
- Decide how many pen and pencil holes you want in your holder.
- Drill that number of holes into the top of the holder (through the bark) at least 1/2 inch apart.
- Cut out the pieces of your photos and the words that you want to use to decorate and personalize your holder and decide where you want to place each piece.
- Using your paintbrush, brush one coat of decoupage clear coat medium over the front (one of the smoothed ends) of your holder.
- Then carefully attach the photo pieces onto the holder by brushing a little decoupage clear coat medium on the back and then sticking them in place.
- Stick any words into place by just sticking them onto the wet clear coat.
- Completely cover the design* and the whole front side with decoupage clear coat.
- Let dry completely.
- You may choose to cover the front with one more coat for a better finish.
(*Hint: When covering any print-out words in clear coat, cover them with a full brush of clear coat in one or two strokes so that you do not cause the ink to run.)
|
|
|


