~ How To Projects ~
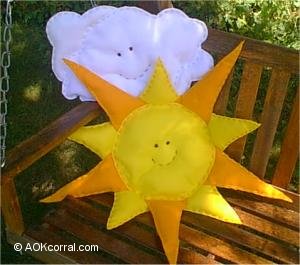
Summer Fun Pillows

Click below for more
Craft Projects and Patterns
|
~ Projects By Theme ~
- Animals
- Seasonal
- Holidays
|
|
Summer Fun Pillows
~
July 2004
|
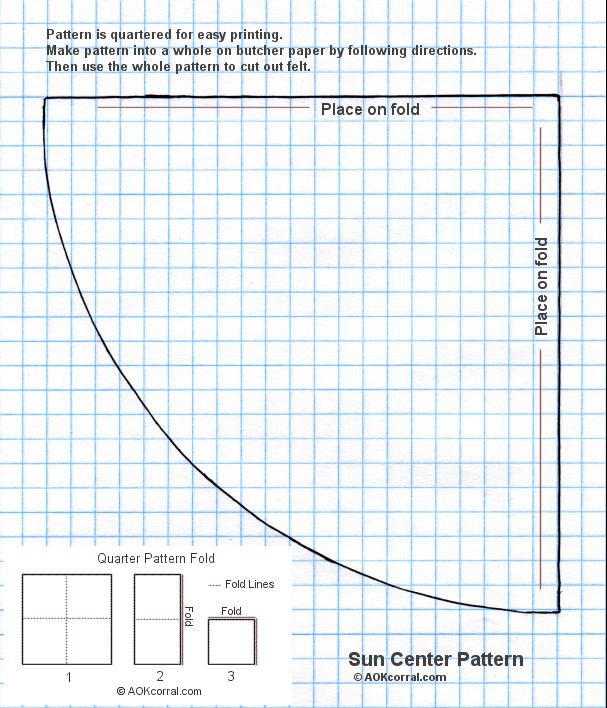
*The patterns for the Sun Center and the Cloud Center are only one quarter of the pattern. You will need to use additional butcher paper or a large piece of paper and follow the directions here to make the whole pattern for cutting out the felt.
- Print and cut out the center quarter patterns for the sun and cloud.
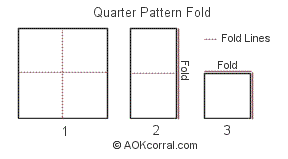
- Get a large piece of butcher paper or other paper (about 4 times the size of the quarter pattern) as in example 1.
- Fold the paper in half as in example 2.
- Fold the paper in half again as in example 3.
- You will now have two sides of your butcher paper with folds. Get the center quarter pattern and lay it on your folded paper so that the sides marked "fold" are against the folded edges of the butcher paper.
- Use a pencil to draw along the pattern edge onto the folded paper.
- Cut along the line through all thickness of the folded paper, then open for a complete whole pattern.
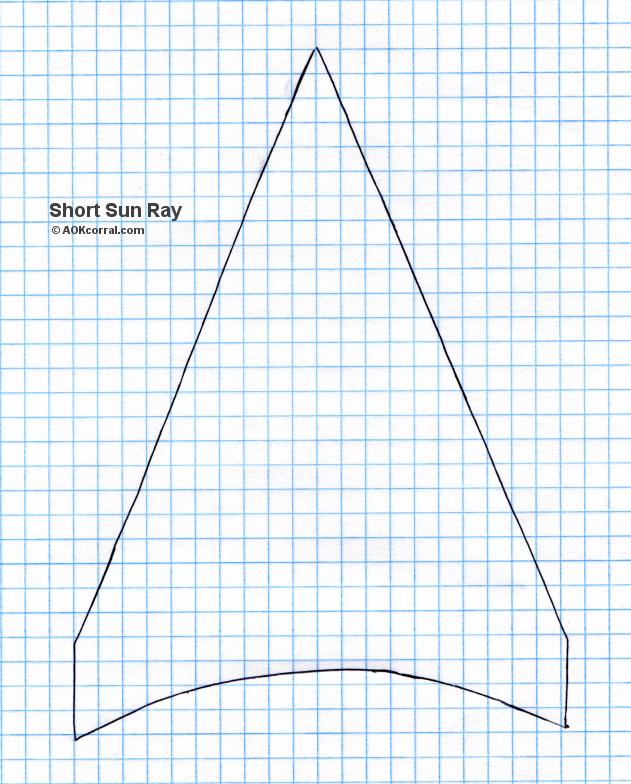
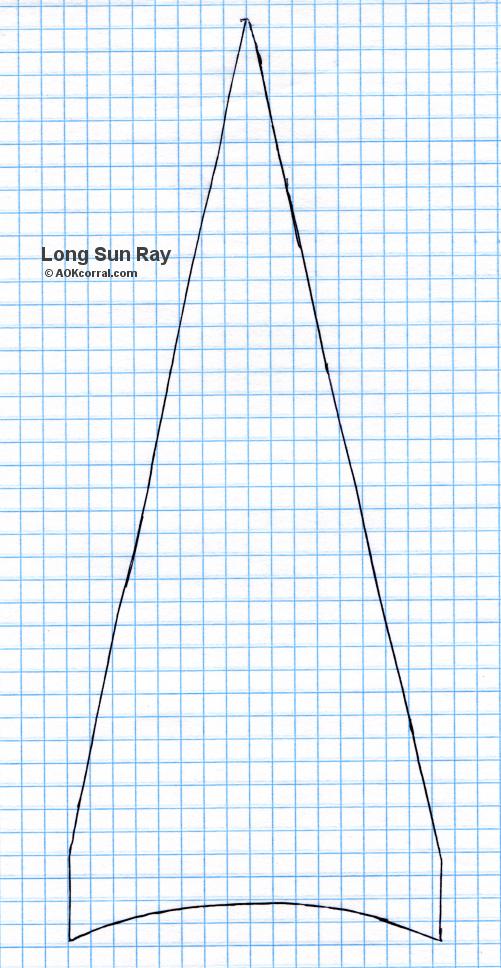
- Cut out all pieces for the pillow using the patterns above.
- To begin stitching together each of the Sun Rays:
- Lay two pieces together with their edges lined up.
- Use all 6 strands of embroidery floss for stitching.
- For yellow rays, use orange floss; for orange rays, use yellow floss.
- Use a running stitch to sew the pieces together (up and down running stitches can be large, approx. 1/2 inch long stitches were used in the sample).
- Stitch about 1/4 inch from the edge along all sides except those marked to be left open.
- After stitching the rays together, put some pillow stuffing in each ray and leave about 1 inch unstuffed at the opening.
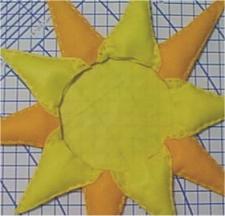
- Lay out one piece of the sun center on a table or work area.
- Lay 1 inch of the open end of all 5 long orange rays on the sun center evenly spaced.
- Next, lay 1 inch of the open end of each short yellow ray between, and overlapping the orange rays. (see photo example)
- Adjust them as needed to make them into an evenly spaced circle that overlaps the sun center piece about 1 inch in from the edge and pin them together with the sun center piece*. (*Make sure the pin tops are high enough that they will be able to be pulled out after the other sun center piece is placed on top and they are stitched together.)
- Lay the other sun center piece on top and match it with the bottom piece so the round edges match.
- Stitch through all thickness following the same stitching guidelines given above for the rays.
- Leave an opening of about 4 to 5 inches.
- Stuff the pillow center through the opening.
- Stitch the opening closed.
- Use brown embroidery floss and stitch a smile using a running stitch. You can stitch completely through the pillow and do a smile on both sides at the same time.
- Stitch eyes using brown embroidery floss and a satin stitch.
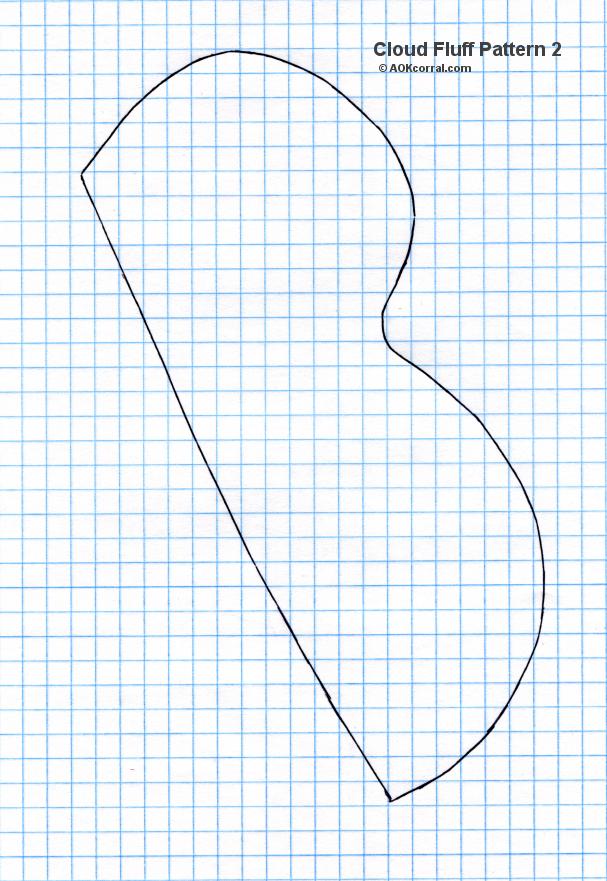
- Cut out all pieces for the pillow using the patterns above.
- To begin stitching together the Cloud Fluff Pieces:
- Lay two pieces together with their edges lined up.
- Use all 6 strands of embroidery floss for stitching.
- Use blue floss for stitching.
- Use a running stitch to sew the pieces together (up and down running stitches can be large, approx. 1/2 inch long stitches were used in the sample).
- Stitch about 1/4 inch from the edge along all sides except those marked to be left open.
- After stitching the cloud fluff together, put some pillow stuffing in each one and leave about 1 inch unstuffed at the opening.
- Lay out one piece of the cloud center on a table or work area.
- Lay 1 inch of the open end of each cloud fluff on the cloud center wherever you like it but make sure that you place the fluff pieces so that at least 1 inch of the open edge is overlapping the cloud center so they will be sewn into the pillow.
- Pin each cloud fluff in place.
- Lay the other cloud center piece on top and match it with the bottom piece so the edges match.
- Stitch through all thickness following the same stitching guidelines given above for the fluff.
- Leave an opening of about 4 to 5 inches.
- Stuff the pillow center through the opening.
- Stitch the opening closed.
- Use brown embroidery floss and stitch a smile using a running stitch. You can stitch completely through the pillow and do a smile on both sides at the same time.
Stitch eyes using brown embroidery floss and a satin stitch.
|
|
|


