~ How To Projects ~
Make Pillow Covers
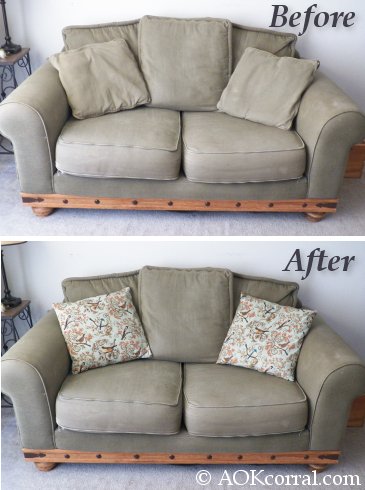
This project shows you how to make your own pillow covers to update or decorate your home.

Click below for more
Craft Projects and Patterns
|
~ Projects By Theme ~
- Animals
- Seasonal
- Holidays
Get this entire project
WITHOUT
Ads, Banners, Logo or Margins
The Easy Print Version contains all instructions and photos.

|
|
How to Make Pillow Covers
~
June 2013
|
|
You may Print this page as it is
...OR...
Purchase the Easy Print Version for $1.49
The Print-out contains all instructions and photos without ads, margins, ads or logos.
|
|
|
- Fabric for pillow covers
- Thread to match fabric
- Buttons, snaps, or Velcro (optional)
- Tape measure
- Rotary cutter, cutting board, and ruler
- Marking pencil
- Sewing machine
- Iron and Ironing Board
|
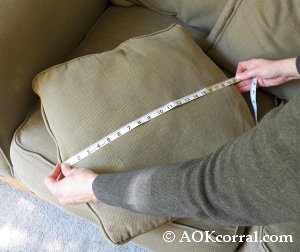
- Measure the length and width of your pillow. If you pillow is thick, be sure your measurement includes the bulge or fluff of the pillow as you measure across, (Lay the measuring tape on the pillow gently so you dont alter the dimensions). Example: 19W x 19L
- Add one inch to each the length and the width for the seam allowance and write down the measurements as your length and width for cutting out the pieces. Example: 20W x 20L
Note: If your fabric has a pattern that requires one end to be the top and one end to be the bottom, the length measurement will be the vertical top to bottom measurement and the width will be the horizontal, left to right measurement.
- For the front of the pillow, cut one piece of fabric with your cutting width and length measurement. Example: 20W x 20L
- For the back of the pillow, cut 2 pieces of fabric with the same length measurement as the front and a width that half the front width plus 2. Example: 12W x 20L
- Lay out both pieces for the back of the pillow, wrong side up.
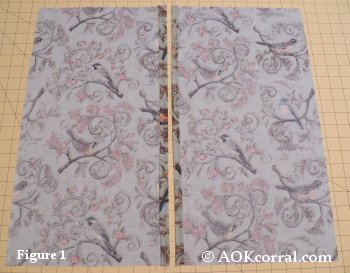
- Fold and press a ½ hem along the inside vertical edges. Then fold and press each hemmed edge in another ½. Stitch in place at ¼ from the hem edge. (Figure 1)
- Lay out the top piece for your pillow, right side up.
- Please one of the hemmed back pieces onto the top, right sides together and raw outside edges even.
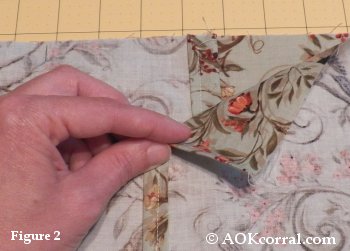
- Place the other hemmed back piece onto the top, right sides together, raw outside edges even and hemmed edge overlapping the other back piece. (Figure 2)
- Pin all pieces in place.
- Stitch around the entire pillow cover at ½ from the edge (½ seam allowance).
- Trim the corners of the seam allowance.
- Turn the pillow cover right side out and push out each of the corners.
- Try the pillow cover on your pillow for fit. See how the back pieces overlap each other and make marks where you want to put buttons, snaps, or Velcro closures.
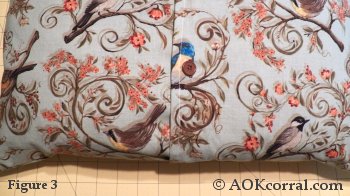
- Remove the pillow cover and attach your choice of closures and put the cover back onto your pillow. (Figure 3)
|
You may Print this page as it is ...OR...
Purchase the Easy Print Version for $1.49
The Easy Print Version includes all instructions and photos without margins, ads or logos.
|
|
|
|
|


