~ How To Projects ~
Pumpkin Decorations

Click below for more
Craft Projects and Patterns
|
~ Projects By Theme ~
- Animals
- Seasonal
- Holidays
|
|
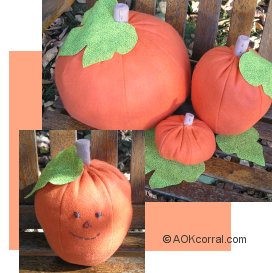
Pumpkin Decorations
~
September 2005
|
- Orange Felt
- Lt. Brown Felt
- Lt. Green Felt
- Orange Embroidery Floss (to match orange felt)
- Lt. Brown Embroidery Floss (to match lt. brown felt)
- Lt. Green Embroidery Floss (to match lt. green felt)
- (Optional) Dark Brown Embroidery Floss for faces.
- Sewing Scissors
- Sharp Needle
- Pins
- Polyester Fiberfil Stuffing
- Sewing Machine
- Pumpkin Patterns and/or Cutting Instructions
|
- Take two of the pumpkin ribs and pin them right sides together all the way down one long side.
- Stitch 1/2 inch seam allowance along the long side from top to bottom.
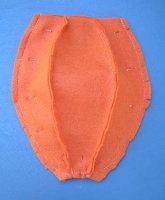
- Take another one of the pumpkin ribs and pin it, right sides together, with one of the other long edges on the pieces you just joined together.
- Stitch along this long side from top to bottom.
- You will now have 3 ribs joined together to form half of the pumpkin. Set aside.
- Repeat the steps 1 through 4 for the other 3 rib pieces.
- Take both half pumpkin pieces and line up all the edges with right sides together.
- Pin the edges together all around the pumpkin leaving the top open.
- Stitch from the top edge on one side of the pumpkin all around to the other top edge on the other side. (Leave the top open.)
- Clip all seam allowances about every 1 inch.
- Turn pumpkin right side out.
- Stuff pumpkin with fiberfil stuffing.
- Thread your needle with the lt. brown floss and knot the end.
- Take the rectangle of lt. brown felt for the stem and roll it up tightly.
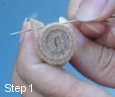  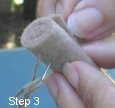
- First, send the needle through the felt just under the rolled end at the top edge so that the knot will be hidden. (see photo step 1)
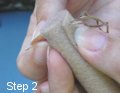
- Then send the needle through all thickness near the place where your floss came through. (see photo step 2)
- Then, insert your needle about 1/4 inch lower through all thickness in the opposite direction. (see photo step 3)
- Continue doing this back and forth until you reach the bottom of the roll, "stem" and knot the end.
- Thread your needle with the orange floss and knot the end.
- Insert your needle through the open top edge of the pumpkin from the inside and about 1/4 inch below the edge.
- Do a running stitch all around the top edge of the pumpkin at about 1/4 inch from the top edge and with stitches that are about 1/4 inch wide.
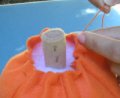
- When you have completed your running stitch around the top edge, separate the stuffing in the top center of the pumpkin and place the stem about 1 inch into the pumpkin top.
- Pull up the floss so that the pumpkin top gathers around the stem and hold tight.
- Send the needle through all the thickness of the stem to the other side and into the top edge of pumpkin on the other side.
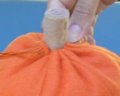
- Send the needle back through the top edge of the pumpkin next to the location it came out from, and again through all thickness of the stem but in another direction.
- Continue sending the needle through all thickness of the stem and catching the top edge of the pumpkin each time through so that the stem and the pumpkin top edge are securely attached to each other.
- Optional: Cut out and sew on leaves from the patterns above if you desire. Embroider fun faces on the pumpkins if you wish.
|
|
|


