~ How To Projects ~
How to Cut Quilt Squares
Use this tutorial to learn how to cut quilt squares with a rotary cutter.

Click below for more
Craft Projects and Patterns
|
~ Projects By Theme ~
- Animals
- Seasonal
- Holidays
Get this entire project
WITHOUT
Ads, Banners, Logo or Margins
Purchase the Ad Free / Easy Print PDF Version for only $1.95

|
|
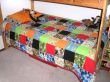
How to Cut Quilt Squares
Go back to How to Make a Quilt / Comforter Main Project Page
© Copyright 2012 by AOK Corral Craft and Gift Bazaar All rights reserved.
These projects are for your personal use only and may not be reprinted or copied.
You may print this page as is or... See our easy print option below.
|
|
|
- Lay your washed and ironed fabric out on your cutting mat.
- Fold your fabric in half matching the selvage edges together with crosswise edges on either side. Smooth out wrinkles. (Dont worry if the crosswise edges dont meet exactly, they usually wont.)
- If you wish, you can fold your fabric in half again with first fold matching up to selvages. Make sure there are no wrinkles in the folds either.
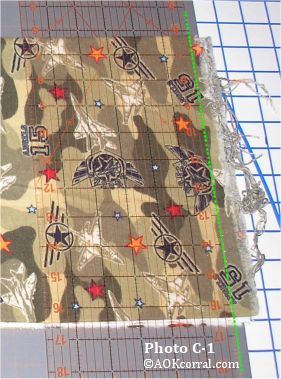
- Position the folded fabric with the crosswise edges extending out beyond the first line on the cutting mat.
- Lay your ruler on top of the fabric and line its edge up to the first line on the cutting mat. (Photo C-1)
- Using your rotary cutter, cut through all four layers, but dont move the fabric after cutting.
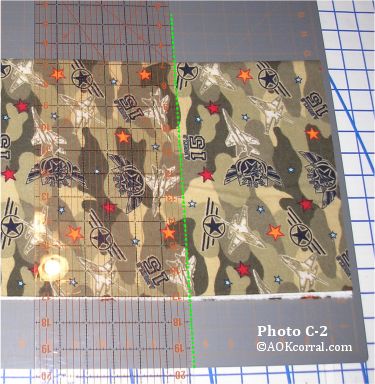
- With the first line on the mat as your starting point, find the line on your cutting mat that corresponds to the width of the square you are making.
- Move your ruler to that line and line up the edge of the ruler to it. (Photo C-2)
- Cut through all layers.
- If you folded the fabric a second time in step 3, open out one fold.
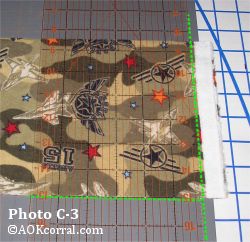
- Turn the fabric 90 degrees and place it back on the mat so the selvage edge is extending out beyond the first line.
- Lay your ruler on top of the fabric and line its edge up to the first line on the cutting mat. Additionally, adjust your ruler to line up one of the horizontal lines on the ruler to the horizontal edge of the fabric strip. (Photo C-3)
- Cut the selvage off, but dont move the fabric after cutting.
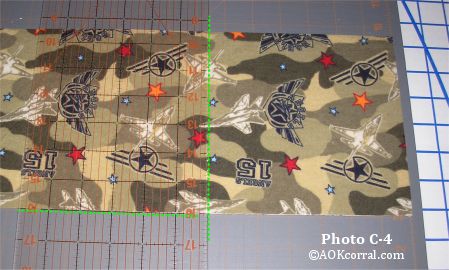
- With the first line on the mat as your starting point again, find the line on your cutting mat that corresponds to the width of the square you are making.
- Move your ruler to that line and line up the edge of the ruler. At the same time, move your ruler to also line up one of the horizontal lines on the ruler to the horizontal edge of the fabric strip. (Photo C-4)
- Cut. You will now have two squares.
- Carefully move the fabric strip so that the cut edge lines up to the first line on the cutting mat again and repeat step 15, then cut.
- Continue making strips and cutting squares until you have all that you need.
Another way to do steps 11 through 17 faster and with great accuracy is to buy a quilters square ruler for the size of square you will be making. With the square ruler, once you make the fabric strip in the correct width, you can just lay the square guide on top of the fabric strip, check to make sure sides line up and make your cuts.)
If your fabric has lines or a special directional print, you will have to do your cutting with one layer of fabric at a time so you can make sure your fabric lines and your cutting lines, match up.
Binding on a quilt/comforter project is usually done as one long strip, stitched around the entire project. Obviously, it would be crazy to buy yards of fabric to go around an entire bed quilt or comforter out of one cut. Instead, we will cut strips of fabric and join them together with the sewing machine.
Cutting the strips for the binding is done in the same manner as cutting the strips to make the squares except that the strips of fabric will need to be cut along the lengthwise grain of fabric to help keep them from stretching out of shape while sewing.
- Lay your washed and ironed fabric out on your cutting mat.
- Fold your fabric in half so that the selvage edges are on each side and the crosswise edges are together. (If you wish, you may fold your fabric in half again with first fold matching up to crosswise edges. Smooth out and make sure there are no wrinkles in the folds either.)
- Position the folded fabric with the selvage edges extending out beyond the first line on the cutting mat.
- Continue as you did for the squares in steps 5 through 9 but make your strips the width needed for the binding.
- Make as many strips as required in the fabric chart for the size of comforter you are making.
|
You may Print this page as it is ...OR...
Purchase the Easy Print Version for $1.95
The Easy Print Version includes ALL these instructions for how to bind a quilt, plus instructions for making a quilted comforter in crib, twin, full and queen sizes without margins, ads or logos.
|
|
|
Go back to How to Make a Quilt / Comforter Main Project Page
|
|
|


