~ How To Projects ~
Scarecrow How To Project
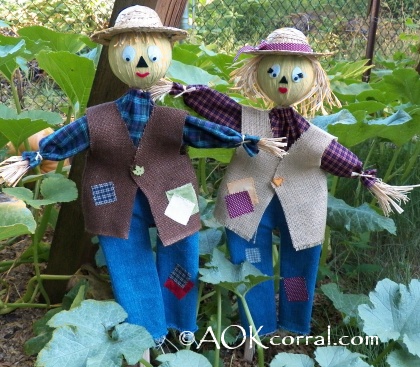
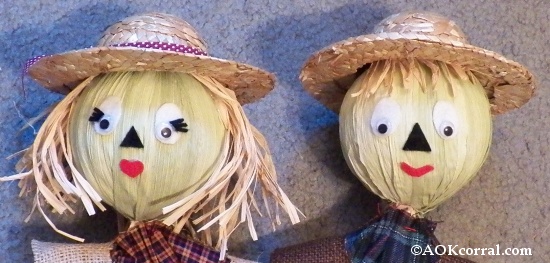
Make this cute scarecrow couple for your porch decorating this fall.

Click below for more
Craft Projects and Patterns
|
~ Projects By Theme ~
- Animals
- Seasonal
- Holidays
|
|
How to Make a Scarecrow
~
September 1999
Updated with new photos and pattern pics, Sept. 2014
|
- Styrofoam ball (4" diameter)
- Corn husks (fresh or dried)
- Felt (black, white, red)
- Wiggly eyes (1/2" diameter)
- Straw hat (approx. 6" diameter at rim edge)
- Large button (1" diameter)
- Small wood stakes (approx. 1/2" to 3/4" width)
- 3 pieces - 7" long
- 1 piece - 26" long
- Burlap
- Denim (old jeans)
- Misc. Fabric for shirt and patches
- Needle and Thread (Sewing Machine if available)
- Sewing pins
- Small nails and hammer
- Glue gun
- Scissors
|
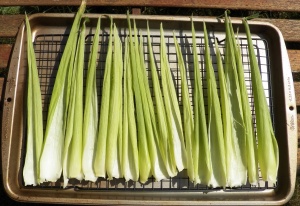
- If you are using fresh corn husks, peel them off the cobs and separate the inner husk layers. Place them on a rack and let them dry in the sun for 2 to 4 hours or if not in the sun, for about 24 hours.
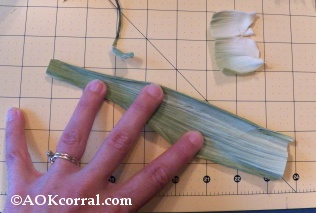
- To prepare the husks for application, cut the harder curved bottom off each husk so that all the husk is pliable and then cut off the thin tip. Make sure that each husk piece is at least long enough to be wrapped from top to bottom of ball, a little overlap can be trimmed later. Tear the husks into strips with widths of between ½ and 1.
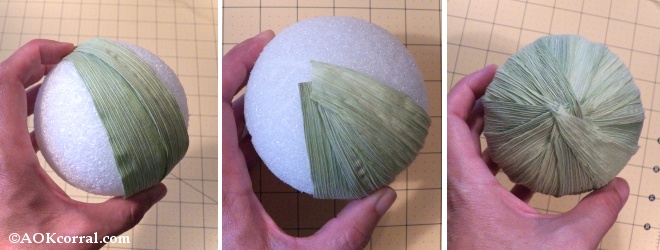
- Heat your glue gun. Run a line of glue along the Styrofoam ball from top to bottom. Working with the top of the corn husk at the top of the ball, lay the corn husk edge onto the glue from top to bottom. If the strip is very wide, you may need to add another line of glue just under the other edge of the husk, then smooth and press it firmly in place.
- Run the next line of glue over the corn husk edge you just pressed into place. Lay the next corn husk over the glue. (Each husk should be slightly overlapping the previous and you will need to start and end your lines of glue at a slight angle over the top and bottom of the ball to cover the round shape. (See photos)
- Repeat, until the ball is covered in corn husks. Trim any extra husk off the top and bottom and glue any loose edges down. (Note: if the corn husks were fresh, they will remain green for some time after they have completely dried. You can help the head to become more golden by leaving it in the sun for an extended period of time. Otherwise it will become more golden with time.)
- Cut wood strips according to the directions: 3 pieces @ 7 long, 1 piece @ 26 long.
- To make the body frame, attach the first arm piece (7") to the body stick (26) about 2 inches down from the top.
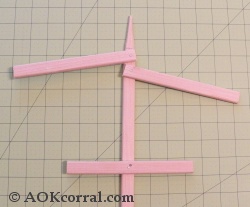
- Attach the other arm just under the first. (You put the arms in whatever position you choose but it is great if you use only one nail so they will move up and down for posing.)
- Attach the hip piece (7"), centered on the body about 8 ½ inches down from the top of the stick.
- Use a pocket knife to sharpen the top 2 of the body stick to make it easier to attach the head.
- Carefully poke your knife into the bottom of the finished head to pierce the overlapped corn husks.
- Push the finished head onto the top of the body frame until the head touches the top of the first arm.
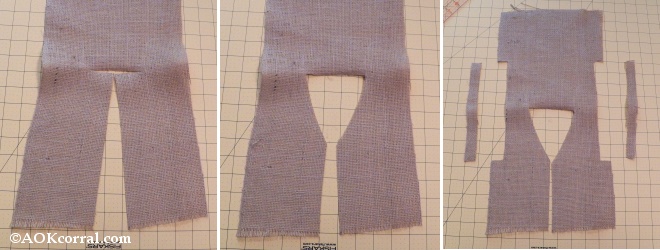
Cut out clothes according to the directions in the diagrams. The measurements of each rectangle are shown in inches on the diagrams. Each block on the diagram is 1 inch on your fabric.
See photo tips for cutting the V in the vest. Cut from the bottom to the fold line first, then cut from the center along the fold in each direction just over 1 ½ , measure 5 inches from the bottom front of the vest and start cutting at an angle to meet the end of the cut at the fold. Repeat on the other side.
- For the shirt, fold the rectangular piece in half along the long side with right sides together.
- Stitch along the seam lines (1/2" seam allowance) turn the shirt right side out.
- Thread a needle with several strands of thread or embroidery floss (at least 16 long).
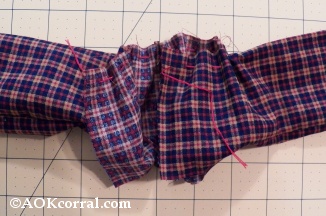
- Starting at the top back of the shirt, stitch a large running stitch all the way around to the other back side of the shirt. Leave the loose ends of the thread hanging so they can be pulled in the next step.
- Slip the shirt on, one arm at a time. Pull the ends of the thread in the shirt top, tighten and knot.
- For the vest, turn it right sides together and stitch the sides under the arms together. (1/2" seam allowance) Turn back to right sides out.
- For the pants, turn right sides together and stitch the sides of the pants, (1/2" seam allowance) then stitch the inner legs of the pants starting at the bottom of one leg and stitching all the way around to the other bottom of the leg. (1/2" seam allowance) Turn the pants back to right sides out.
- Cut out little squares of scrap fabric for patches and stitch them in place wherever you desire.
- Put one leg over the stick and pull them up so that each side is just above the wood hip piece. Pin or stitch the pants top edge together so they will not fall back down off hip piece.
- Put the vest on and adjust to fit. Overlap the front of the vest to determine where the button should go. Simply sew a button on one side and make a small cut in the opposite side for the button hole.
- Cut a small bunch of raffia and put it up the sleeve. (Make sure you have at least 2 inches of length inside the sleeve)
- Using a strong piece of the raffia, tie the end of the sleeve tightly shut, holding the raffia in.
- Glue on a face as shown or use your imagination to create your own.
- Using clumps of raffia for hair, glue them onto the head.
- Decorate the hat if desired. Apply some glue to the inside of the hat rim and firmly place onto the head. Evenly space about four pins through the hat and into the head for extra strength.
|
|
|


