~ How To Projects ~
Decorating with Eggs

Click below for more
Craft Projects and Patterns
|
~ Projects By Theme ~
- Animals
- Seasonal
- Holidays
|
|
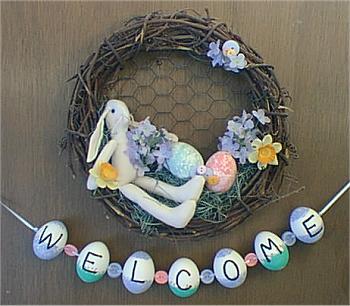
Decorating with Eggs
~
April 2003
|
- Eggs
- Sharp Skewer
- Craft Paint
- Paint Brushes
- Glue Gun
- Ribbon, 1/8 inch.
- Buttons, 1/2 & 3/4 inch
- Long needle (with long eye)
- 10-12 inch Grapevine Wreath
- 12 x 12 inch piece of chicken wire
- Spray Paint (optional)
- Spanish moss or Fake grass
- Glue Gun
- Small Bunny doll
- Decorated eggs (see left)
- Flowers & Accessories
- You may need wire cutters
|
Let the eggs sit out of the refrigerator for about 30 minutes before you begin.
- Shake the egg to break up the yolk inside.
- Hold the egg on a table, laying it on it's side.
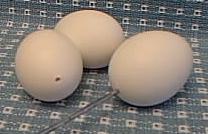
- With the skewer point at one end of the egg, gently apply pressure as you turn the skewer like you're screwing it into the egg.
- Make a hole in the other end of the egg using the same method.
- Blow into one end of the egg over a bowl.
- After all the egg is out of the shell, submerge the egg in water, shake and blow out again, pat dry. Now you are ready to paint of decorate the egg to your liking.
- Using the same method described above for making holes, take one of the blown out eggs, gently twist one hole into each side of the egg (about 1 inch down from the top). Do this to all the eggs that will be in the sign.
- Cut a long piece of ribbon (36 inches for welcome sign)
- Tie a knot in the ribbon about 9 inches from one end. (Make sure it is a big enough knot that it won't slip through the hole in the egg)
- Thread the needle with the other end of the ribbon.
- Send the needle through the sides of the first egg, pull through until the knot rests against the egg.
- Send the needle through the button holes of the first button, push the button onto the ribbon until its edge is resting against the side of the first egg.
- Send the needle through the sides of the next egg, push it along until it is up against the edge of the button.
- Repeat these steps until you have put on all your eggs and buttons.
- Tie a knot at the end making sure to have the ball of the knot against the egg so it can't become loose.
- To cover the holes in the top and bottom of the eggs, glue on buttons of other decorations.
- Spray paint chicken wire if desired, let dry.
- Turn wreath so that back faces up.
- Turn chicken wire so that back faces up and lay it over the wreath (Use wire cutters if necessary to shape the chicken wire).
- Fold ends of chicken wire into the back of the wreath, twisting around sticks so that it is secure. (Do this all the way around the wreath).
- Using the glue gun to secure, apply grass, bunny, eggs, flowers, and accessories (in this order) as seen in the photo.
|
|
|


