~ How To Projects ~
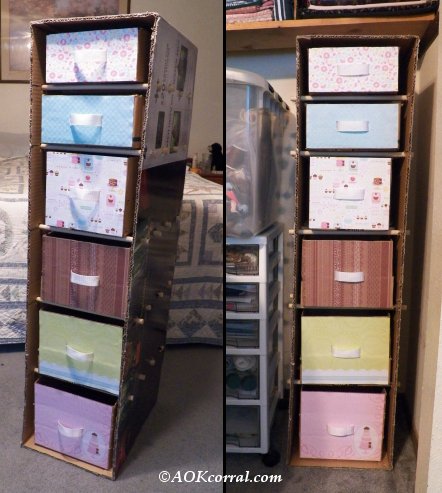
Make a Chest of Drawers
This project is great for making your closet more organized without spending a bunch of money. Recycle boxes for a useful chest of drawers.

Click below for more
Craft Projects and Patterns
|
~ Projects By Theme ~
- Animals
- Seasonal
- Holidays
Get this entire project
WITHOUT
Ads, Banners, Logo or Margins
The PDF Version contains all instructions and photos.
Purchase the Ad Free / Easy Print PDF Version for only $1.49

|
|
How to Make a Chest of Drawers & Shelves with Boxes
~
May 2013
|
|
You may Print this page as it is ...OR...
Purchase the Easy Print Version for $1.49
The PDF Version contains all instructions and photos without ads, margins, ads or logos.
|
|
|
- Boxes for shelf body and drawers (See instructions for suggestions on selecting a box.)
- Wooden dowels (½ inch diameter)
- Trim webbing ( 1 wide ) for making handles
- Decorative paper (optional)
- Yard stitch or ruler
- Heavy duty scissors
- Pocket knife or medium box knife
- Marking pen
- Good craft glue
- Safety pins large
Optional: This chest is intended for use in a closet area so the outside of the box is unfinished. If you want the outside to look more finished, you could put dowel caps on all dowel ends outside the chest and spray paint the outside of the box.
|
You can choose from many different sizes of box for making the body of your shelves, but one important thing to consider when selecting a box; how much weight will you be storing in the box drawers? The wider the area from left to right in your chest box, the less weight you can hold in your drawers. Another important thing to look for is a box that has thick cardboard. A thicker box is stronger for supporting the shelf dowels and drawers.
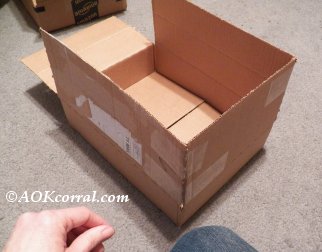
After you have selected a box to use as the body for your shelves, choose boxes for drawers that will fit inside the chest box. You can choose some for deep drawers and some for shallow drawers, whatever you want to do. Stack them inside to get an idea of what will work (more detailed instructions follow).
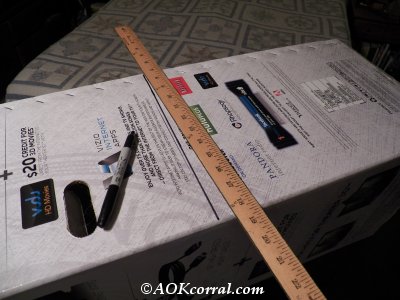
- Decide if you want your box shelf to remain as deep as it is or if you need to shorten its depth. We used a large screen TV box and so we needed to shorten the depth of the box. (This can also be determined by the boxes you have chosen for your drawers.)
- Decide on the depth you want, then measure and mark a line starting from the box base and extending toward the opening.
- Using your box knife carefully cut the box along the lines.
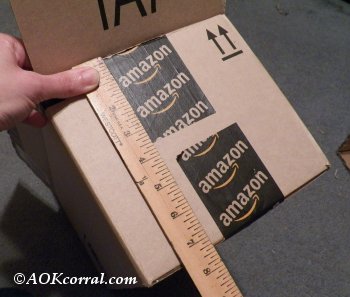
- At this time you will need to do some measurements and calculations to decide exactly which box drawers will fit into your chest. Stand your chest box as it will be used. Measure the height of the box. Write down the measurement.
- Measure the height of each box you want to use as a drawer. Write these measurements down.
- You can adjust boxes with flaps to be shorter or taller. For shorter, cut the flaps off the box and use as is. For a taller drawer, stand the flaps up and wrap packing tape around each corner to secure the flaps in the raised position.
- For each drawer, count 1 inch (this is for the dowels and openings between drawers). For example, if you have 6 drawer boxes, you will need 6 inches. Write it down.
- Total up all the drawer height measurements and additional inches from steps 2 and 3, see if the total will fit inside your chest box total height. If they fit and there is extra space, that extra space will be taken care of in the next section, just write down the amount of additional space. If they dont fit, you will need to remove a box or adjust the boxes you are using to make the total fit.
- Here is the example of how we figured our boxes:
- Total height of chest body box is 47 inches
- Box drawer heights in inches: 8, 8, 7.5, 7.5, 4, 4 = 39
- Add 1 inch for every drawer, 6 drawers = 39 + 6 = 45 (2 extra inches)
- Before you begin your shelves, you will need to divide any extra space you had when calculating the total in the last section, among your drawers.
- Divide your extra space by the number of shelves: (this measurement can be approximate, dont worry about exact measure here) 2 inches / 6 drawers = 5/16 of an inch
- For each drawer, take the measurement of the drawer, plus the additional 1 inch, plus the extra space measurement your just figured, this is your shelf total. Write the shelf total onto the front of the drawer so you can easily make marks for that drawers shelf as you go.
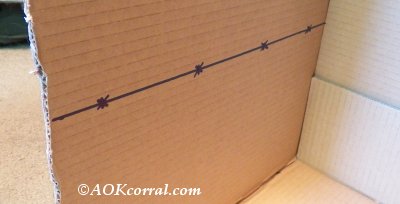
- On the inside of the chest box, starting from the bottom, measure the shelf total for the first drawer and make marks along the side. Draw a line on the inside along the marks.
- Repeat on the other side of the box.
- On the first line, measure and mark a 1 inch X at 2 inches from the front edge of the box and then at every 4 inches, make another X on the line until your reach 4 inches or less from the back of the box.
- Repeat on the other side of the box.
- Continue up the chest box, measuring and marking as given in steps 3 through 6 for each drawer.
- All your X lines should be about 1 inch in length centered over the line, now carefully push your knife through the cardboard at the marks and cut along the lines.
- Measure your chest box width including the width of the cardboard edges.
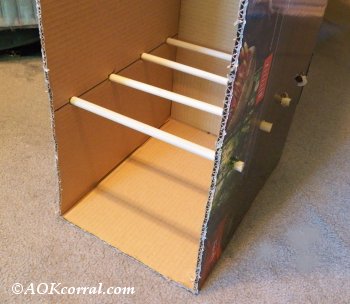
- Cut your wooden dowels to a length that is 1 inch longer than the width of your box. For example: our box was 11 inches wide (with cardboard edges), so we cut the dowels to 12 inches.
- Insert a cut wooden dowel through both sides of the chest box at each set of X marks.
- Check to make sure each drawer fits onto its shelf correctly. (If you should find that a drawer is a bit to tall to fit into its shelf, you can always trim the top edge of the box down to size.)
- Measure and cut out decorative papers to cover the front of each box drawer.
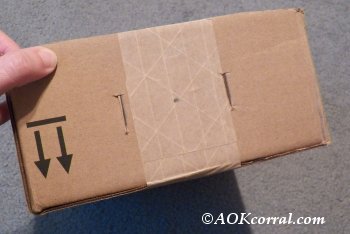
- Before attaching the paper, measure and mark the center of the box drawer front. Then measure and make a mark 1 ½ inches to the left of center and another mark 1 ½ inches to the right of center. These are the handle locations.
- Make a centered, vertical line over each of the handle marks. Make the lines just a bit longer than your webbing trim is wide, 1 inch wide trim = 1 ½ inch long lines.
- Pierce through the lines with your knife from the outside to the inside. (Move the blade around to enlarge the open just a bit.)
- Now, glue the decorative paper to the front of the drawer box.
- After the glue has dried, send the point of your knife from the inside of the box to the outside, through the openings just enough to pierce the paper. Then, from the outside of the box, send your knife through the paper at the location of the cut.
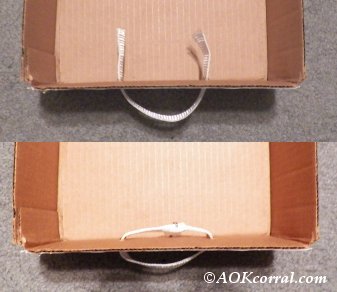
- Cut a piece of webbing trim, 8 inches long, send each of the ends through the cuts from the outside to the inside. Pull until the strap left on the outside is just enough for a handle.
- On the inside, overlap the extra ends of webbing and pin together with a large safety pin.
- (Optional: You can also line the inside of the drawers with pretty paper too)
|
You may Print this page as it is ...OR...
Purchase the Easy Print Version for $1.49
The Easy Print Version includes all instructions and photos without margins, ads or logos.
|
|
|
|
|


